Siddhasana is a powerful seated posture used for meditation, pranayama, and energy alignment. However, for individuals with tight hips, stiff knees, or limited flexibility, sitting comfortably in Siddhasana can be challenging. To make the pose more accessible, modifications using props and alternative positioning can help reduce strain, improve alignment, and gradually increase flexibility. These adjustments ensure that you can experience the benefits of Siddhasana without discomfort. So, see below Siddhasana modifications for tight hips.
Table of Contents
Signs Your Hips Are Too Tight for Siddhasana:
If your hips are too tight for Siddhasana (Accomplished Pose), your body may give you clear signals. Here are some key signs to watch for:
Knees Stay High:
If your knees remain significantly elevated rather than resting close to the ground, your hip flexibility needs improvement.
Hip or Groin Pain:
Discomfort, pinching, or pain in the hips, groin, or inner thighs may indicate restricted hip mobility.
Lower Back Rounding:
If your lower back rounds instead of maintaining a natural curve, it’s a sign your hips aren’t open enough for proper spinal alignment.
Difficulty Sitting Still:
If you constantly fidget, shift weight, or feel restless, it may be due to tightness or discomfort in the hips.
Numbness or Tingling:
Restricted circulation in the legs, feet, or hips may occur if the hips are too tight and compressed in the pose.
Hip Cramping or Fatigue:
If your hips tire quickly or cramp within minutes of sitting, it indicates a lack of flexibility and endurance.
Prop-Based Modifications Of Siddhasana Modifications for Tight Hips:
If you experience hip tightness, discomfort, or difficulty maintaining proper alignment, using props can make Siddhasana more accessible and comfortable.
1. Sit on a Yoga Block or Cushion:
Purpose: Elevates the hips, reduces strain, and improves spinal alignment.
Place a yoga block, cushion, or folded blanket under your sit bones to slightly lift the hips above the knees. This modification helps reduce pressure on the hips and knees, especially if they feel tight or strained.
2. Use a Rolled Blanket Under the Knees:
Purpose: Supports the knees if they don’t reach the ground comfortably.
Place a rolled blanket or yoga blocks under each knee to relieve tension and prevent overstretching. This modification is ideal for those with hip stiffness or knee discomfort.
3. Back Support Against a Wall:
Purpose: Helps maintain an upright posture for those with weak core or back muscles.
Sit with your back lightly touching a wall for added postural support. Ensure your shoulders remain relaxed and not pressed too firmly against the wall.
4. Strap for Ankle & Shin Support:
Purpose: Reduces discomfort in the feet or ankles.
If your feet feel strained in Siddhasana, wrap a yoga strap loosely around your ankles to hold them in place comfortably. This prevents excess pressure on the ankles while maintaining the pose.
5. Blanket Under the Ankles:
Purpose: Prevents ankle discomfort from prolonged sitting.
Place a thin folded blanket under the ankles to cushion them and relieve pressure on the joints.
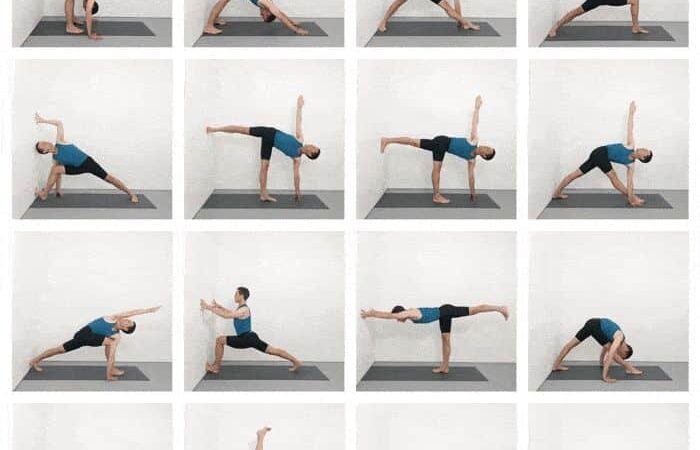
Pre Poses Of Siddhasana Modifications for Tight Hips:
To sit comfortably in Siddhasana (Accomplished Pose), it’s essential to open and strengthen the hips. The following yoga poses help improve hip flexibility, mobility, and comfort before practicing Siddhasana.
Baddha Konasana For Siddhasana Modifications for Tight Hips:
Baddha Konasana, also known as Butterfly Pose or Bound Angle Pose, is a classic hip-opening yoga posture that improves flexibility in the hips, inner thighs, and groin. It is excellent for preparing the body for seated meditation postures like Siddhasana.
How to Do Baddha Konasana :
- Sit on the Floor: Keep your spine tall and shoulders relaxed.
- Bring Soles Together: Bend your knees and bring the soles of your feet together, allowing the knees to drop outward.
- Hold Your Feet or Ankles: Keep your grip firm but relaxed.
- Engage the Spine: Sit upright with a neutral spine—avoid slouching.
- Deepen the Stretch: Press the knees gently toward the ground with your elbows.
- Breathe & Hold: Take deep breaths and hold the pose for 30–60 seconds (or longer).
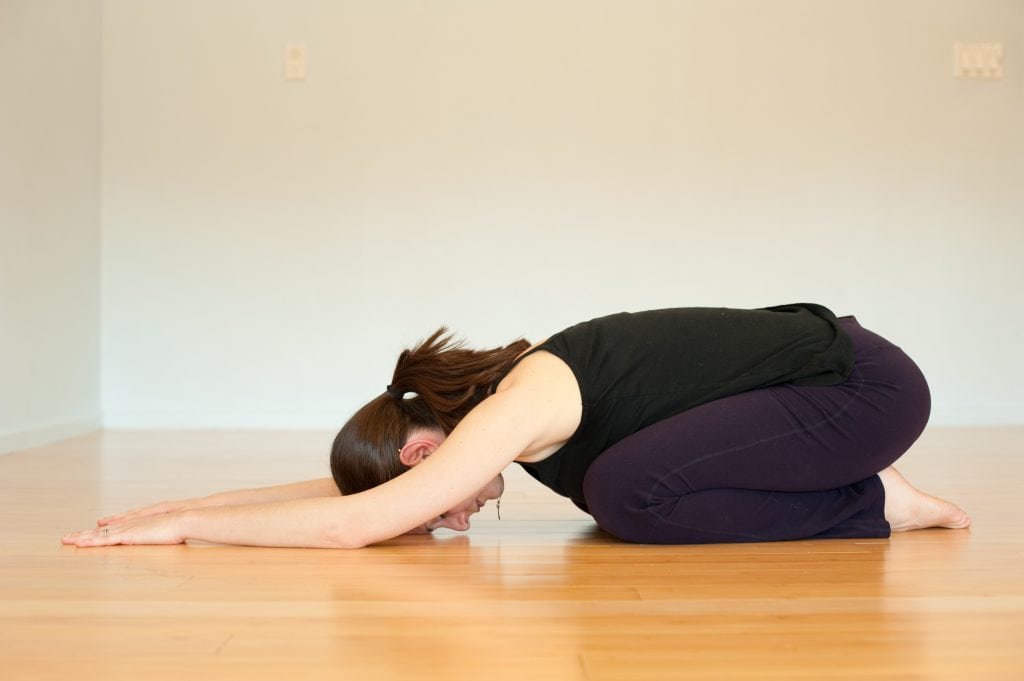
Janu Sirsasana For Siddhasana Modifications for Tight Hips:
Janu Sirsasana, or Head-to-Knee Forward Bend, is a seated yoga posture that provides a deep stretch for the hamstrings, lower back, and hips. It is excellent for improving flexibility, calming the mind, and preparing the body for seated meditation poses like Siddhasana.
How to Do Janu Sirsasana:
- Sit on the Floor: Extend both legs straight in front of you in Dandasana (Staff Pose).
- Bend One Knee: Bring the sole of your right foot to the inner left thigh, keeping the right knee relaxed and pointing outward.
- Align Your Spine: Inhale, lengthen the spine, and keep your shoulders relaxed.
- Fold Forward: Exhale and hinge at the hips, reaching towards your extended foot while keeping the back straight.
- Hold & Breathe: Stay in the pose for 30 seconds to 1 minute, breathing deeply.
- Switch Sides: Repeat on the other leg.
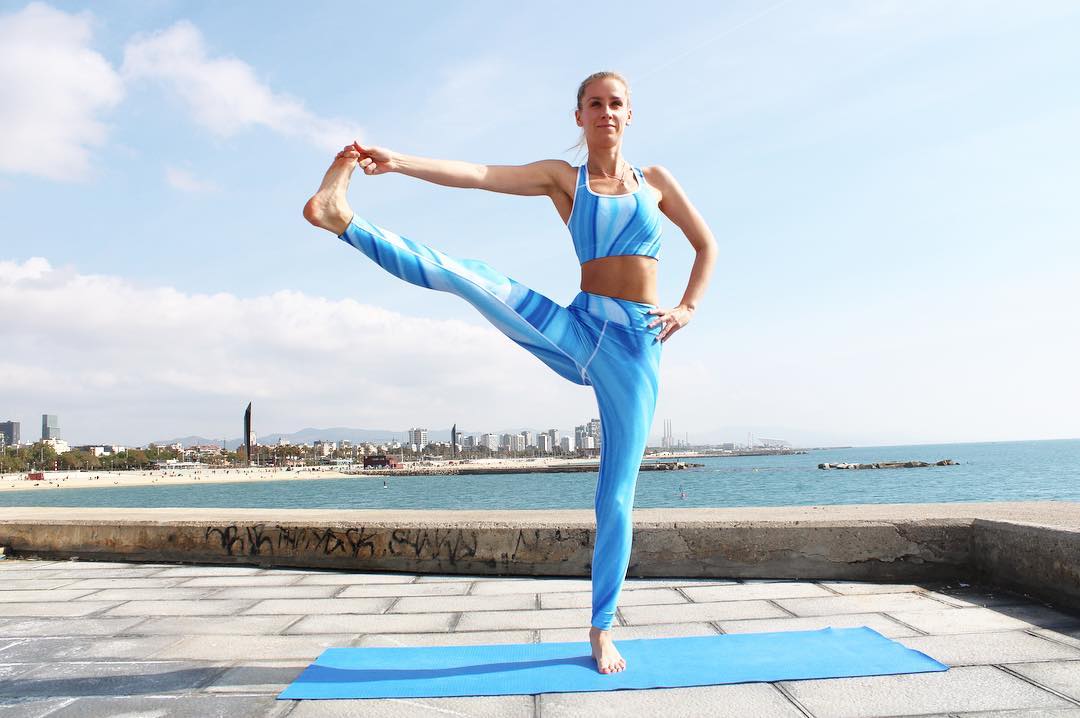
Supta Padangusthasana:
Supta Padangusthasana, or Reclining Hand-to-Big-Toe Pose, is a fantastic pose for improving hamstring flexibility, hip mobility, and lower back relief. It is especially beneficial for those preparing for Siddhasana, as it helps loosen tight leg muscles and enhances overall body alignment.
How to Do Supta Padangusthasana:
- Lie on Your Back: Extend both legs straight on the floor, arms resting beside you.
- Lift One Leg: Inhale and lift your right leg toward the ceiling while keeping your left leg extended and pressing into the ground.
- Hold Your Big Toe or Use a Strap: If flexible, grab your big toe with your right hand (using two fingers). If needed, use a yoga strap around your foot and hold it with your hand.
- Keep the Leg Straight: Engage the thigh muscles and avoid bending the knee.
- Ground the Opposite Leg: Keep your left leg pressing into the floor for stability.
- Hold & Breathe: Stay in the pose for 30 seconds to 1 minute, breathing deeply.
- Switch Sides: Repeat with the left leg.
Alternative Poses Of Siddhasana Modifications for Tight Hips:
The alternative poses are…
Ardha Siddhasana For Siddhasana Modifications for Tight Hips:
Ardha Siddhasana, or Half Accomplished Pose, is a variation of Siddhasana (Accomplished Pose) that is more accessible for those with hip tightness or knee discomfort. It provides similar meditative benefits while reducing strain on the lower body.
How to Do Ardha Siddhasana:
- Sit on the Floor: Start in Dandasana (Staff Pose) with your legs extended straight.
- Bend One Leg: Bring your left heel close to the perineum, placing it against the inner right thigh.
- Position the Other Foot: Instead of tucking it in fully (as in Siddhasana), keep the right foot in front of the left ankle or lightly rest on the shin.
- Keep the Spine Tall: Sit upright with your shoulders relaxed and chest open.
- Hand Placement: Rest hands on the knees in Jnana Mudra (wisdom gesture) or Chin Mudra (consciousness gesture).
- Breathe & Hold: Stay in the posture for 5–10 minutes, gradually increasing duration.
- Switch Sides: Repeat with the other leg to balance both hips.
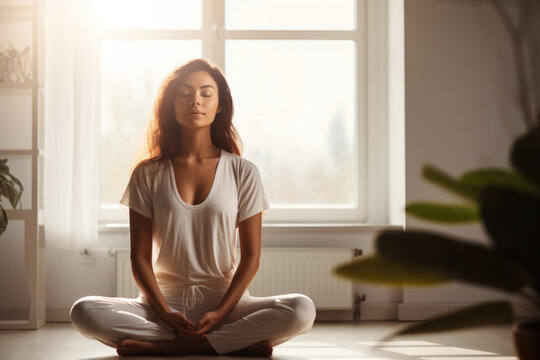
Sukhasana:
Sukhasana, or Easy Pose, is a simple cross-legged seated posture commonly used for meditation, pranayama (breathing exercises), and relaxation. It is one of the most accessible seated yoga poses, making it a great alternative to Siddhasana or Padmasana, especially for beginners or those with tight hips.
How to Do Sukhasana:
- Sit on the Floor: Start in Dandasana (Staff Pose) with legs extended.
- Cross Your Legs: Bend your knees and bring your shins in front of each other, so your feet rest under the opposite knee or thigh.
- Align Your Spine: Sit tall with your shoulders relaxed and the crown of your head lifted upward.
- Rest Your Hands: Place hands on the knees in Jnana Mudra (wisdom gesture) or Chin Mudra (consciousness gesture). Alternatively, rest them on your lap for comfort.
- Relax Your Face & Breathe: Close your eyes, take deep breaths, and stay in the pose for 5–15 minutes or longer during meditation.
Conclusion:
These prop-based modifications make Siddhasana more accessible while maintaining its benefits. Choose the adjustments that work best for your body, and gradually build flexibility and endurance over time. Perfect your form with Siddhasana’s benefits and steps.
FAQ On Siddhasana Modifications for Tight Hips:
Q. Can Siddhasana worsen hip pain?
A. Yes, Siddhasana can worsen hip pain if there is pre-existing tightness, injury, or improper alignment. Since the pose requires external hip rotation and prolonged sitting, it may cause discomfort or strain, especially for those with hip stiffness, arthritis, or past injuries.
Q. How long does it take to open the hips for Siddhasana?
A. The time it takes for Siddhasana to open the hips varies based on flexibility, consistency, and body type. On average:
- Beginners: 4 to 8 weeks with regular practice (if hips are tight).
- Moderate Flexibility: 2 to 4 weeks of focused hip-opening stretches.
- Naturally Flexible Individuals: You may achieve this within a few sessions.